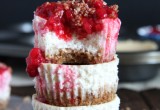
 You guys! I am beyond excited to share this recipe with you. It was a long time coming.
I thought about the idea for these mini protein cheesecakes a while back and had originally tried to make them no-bake, but that wasn’t working, so once I moved back into an apartment with an oven it was game-on for recipe testing.
 My first batch was overcooked, dry, crumbly, cracked, and just bad. They tasted good but the texture was all wrong so it was back to the drawing board after some research on how to keep cheesecake moist (sorry if you hate that word).

 The second time around, I changed a few things. I added a tablespoon of all purpose flour to the mixture, which is a tip I got from adapting Sally’s recipe. I also cooked the cheesecakes for a little less, let them sit in the oven with the door propped open for about five minutes afterwards, then let them cool completely at room temperature, and finally let them set in the fridge for about two hours. Basically, you want the middle of the cheesecakes to still be a little undercooked (wobbly like jell-o) when you turn the oven off because they will set as they cool and when they are stored in the fridge. The fist time around I rushed the cooling at room temperature step and my cheesecakes cracked and sunk a lot.
Side note: I’m mildly obsessed with how these photos came out and I think they might be the best I’ve taken yet on the blog so I couldn’t help but share tons.

 Let’s first discuss the crust. This is not your traditional butter and graham cracker crust. Instead, I decided to use almond meal, ground oats, brown sugar, and coconut oil as the main ingredients. This makes a flavorful and gluten free (if you use gluten free oats) crust. It does not get as crunchy as the traditional crust but it stays together and has a great brown sugar taste. All you need to do is mix together the ingredients, spoon it into your cupcake wrappers, push down with the bottom of a cup, and bake for about 8 minutes to set the crust together.
 The filling is made with light cream cheese, low fat cottage cheese, and egg whites as the main ingredients. This reduces the calories a ton and still gives you the classic cream cheese taste.
 These are called protein cheesecakes mainly because I was afraid that if I called them cottage cheese cheesecakes then I would scare some people off. I swear you would never know they have cottage cheese in them, but that plus the egg whites brings one mini cheesecake in at 7 g of protein! I was honestly surprised these didn’t have more protein per cheesecake when I did the calculation, but that’s still way more than you would get in your classic, full-fat cheesecake. You could also try subbing a tablespoon of protein powder for the flour and see how that increased the protein.

- 1/4 cup oat flour
- 1/4 cup almond meal
- 1 tablespoons + 1 teaspoon coconut oil, melted
- 1 tablespoon brown sugar
- 1/4 teaspoon cinnamon
- 1/4 teaspoon salt
- 4 oz. 1/3 % less fat cream cheese, softened to room temperature
- ½ cup low-fat (1%) cottage cheese with some liquid, room temperature
- 2 egg whites, room temperature
- 1 tablespoon all purpose flour
- ½ tablespoon lemon juice
- 2 ½ teaspoons stevia
- 1 teaspoon pure vanilla extract
- ½ cup frozen raspberries
- stevia, to taste
- Preheat oven to 350 degrees F. Place 6 cupcake liners in a standard size muffin tin.
- Add all crust ingredients to a food processor or bowl and mix until combined. Add 1 heaping tablespoon to each muffin liner and press crust into the liners with the bottom of a cup.
- Bake for 8 minutes. Remove and allow to cool as you prepare the filling.
- Add cream cheese to a food processor and process until smooth. Next, add cottage cheese and egg whites, and process until mixture is completely smooth and creamy. Finally, add flour, lemon juice, stevia, and vanilla extract and process for another full minute.
- Pour the filling on top of each crust until nearly full.
- Place an oven safe cup or bowl filled with about ½ cup water in the oven with the muffin tin and bake for 15-20 minutes (the centers will still be slightly jiggly, which you want because they will set as they cool). Don’t let the cheesecakes brown. The top of the cheesecakes will have risen and they will fall as they cool.
- When done, turn off the oven, prop it open and leave the cheesecakes for another five minutes.
- Allow the cheesecakes to cool completely at room temperature before placing in the refrigerator to cool for at least two hours. Don’t skip the cooling steps.
- Before serving, microwave raspberries until warm and mash them with stevia. Top each cheesecake with raspberry compote and leftover uncooked crust mixture.
*Nutrition information does not include toppings.
Filling recipe adapted from Sallys Baking Addiction (http://sallysbakingaddiction.com/2014/01/05/skinny-chocolate-chip-cheesecake-bars/)


the pictures are totally gorgeous and so worth the photo bomb!!!! Love love love! Also I’m totally cool with the word moist but I hate the word melon (ew).
I think you’re the first and only person I know who hates the word melon. Thanks for the compliment!
great healthy dessert!
Hello my new fave post workout snack 🙂
Love the recipe Katie and those photos are incredible! Well done girl 🙂
Thanks, Emma! I’m all for eating these any time of the day 😉
Katie is it ok if I share your beautiful pic and link back to your protein cheesecake recipe on my blog tonight (betterwithcake.com) ?
Of course, Emma! Thanks for asking 🙂
Yes to protein in my dessert! These look amazingly delicious…and I love all the care you put into the ingredients! Thanks so much for sharing with us at Saturday Night Fever, Katie….hope to see more of your delicious recipes this week! xo
Cathy- reading this comment absolutely made my day. Thank you for the kind words and I will definitely be sharing more on the Saturday Night Fever link ups! Thanks for hosting!
These look fabulous!!! Do you think I could substitute a wheat-free flour for the all-purpose flour in the filling? Any suggestions? (P.S. I don’t mind the word ‘melon’, just don’t like any melon, except watermelon. ;))
Definitely, Barb. The flour is just used as a thickener so I think you could get away with another flavorless flour or you could use a little cornstarch (probably not as much but I’m not sure of the amount).